How to use Quick Chat to test your AI agent, evaluate its responses, and leave positive or negative feedback that creates tickets for our team
Quick Chat is a testing environment inside Mindo that lets you chat with your AI agent without sending messages to real customers. You can verify that it responds correctly and, if something isn’t right, leave feedback so our team can improve it.
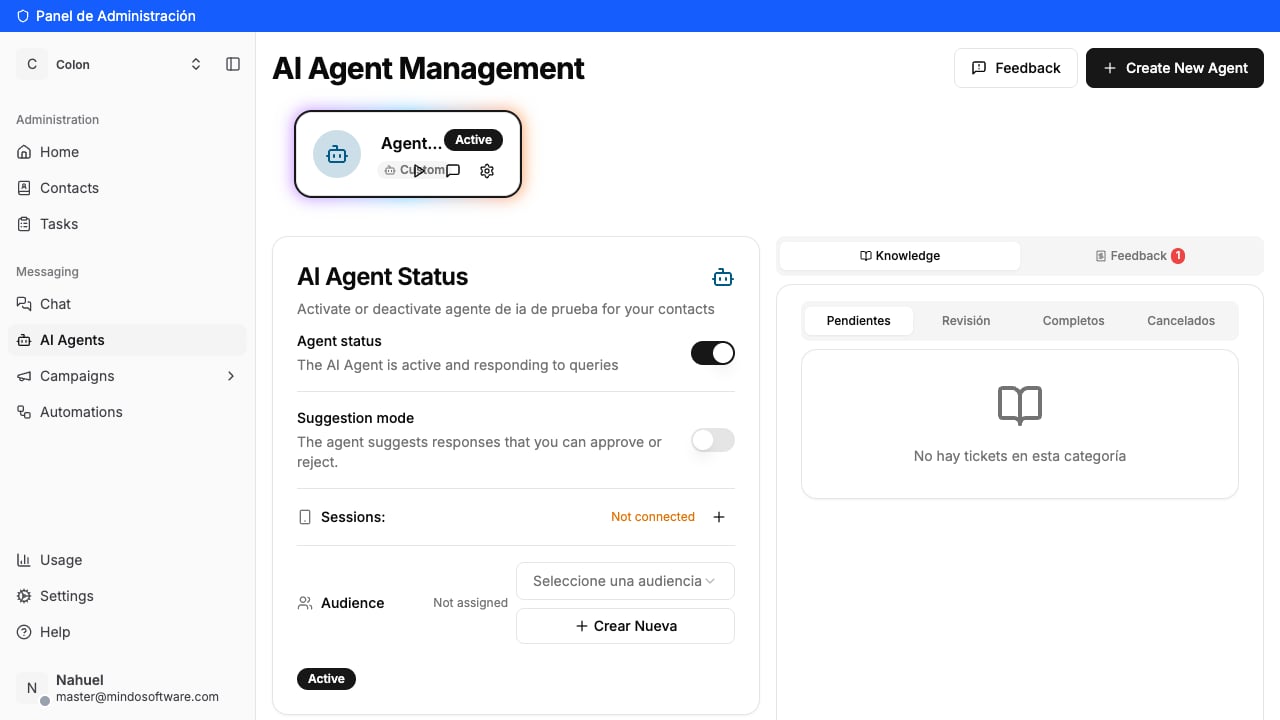
In the left sidebar, under the Messaging section, click AI Agents. You’ll see your agent with its status (active or inactive) and three buttons: Test agent, Quick Chat, and Settings.
AI Agents section with the active agent
2
Click Quick Chat
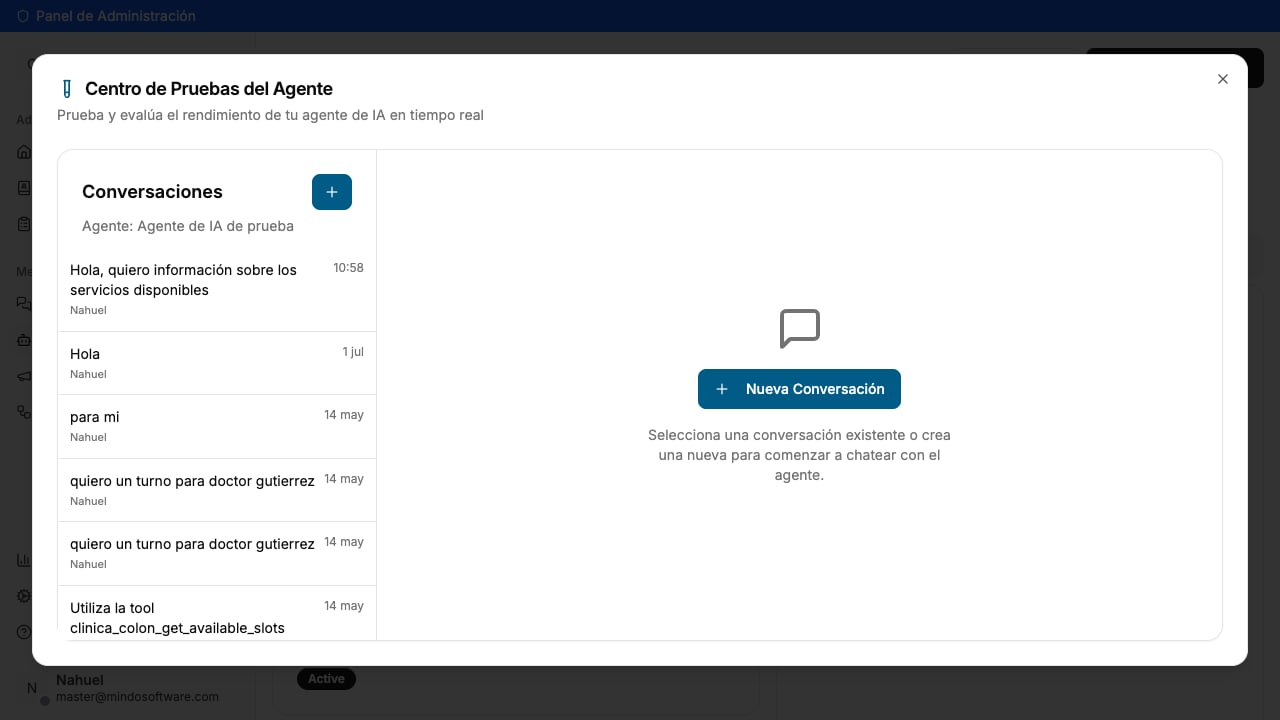
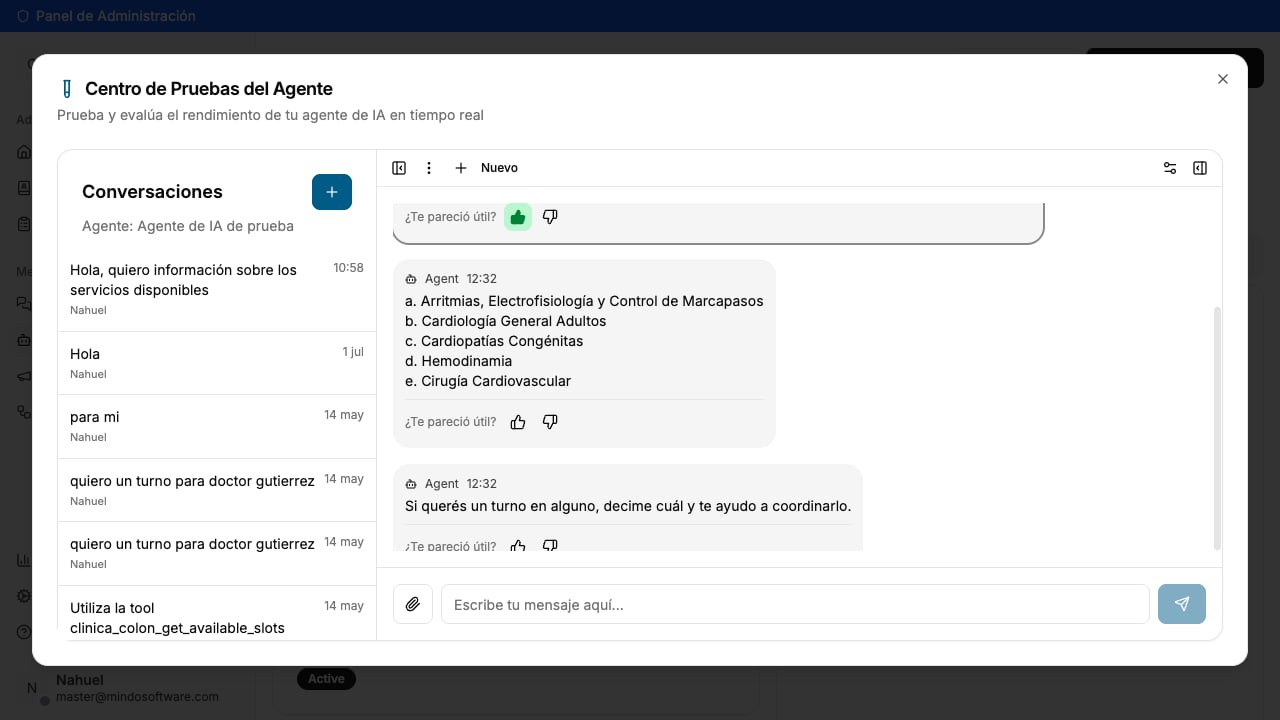
The Agent Testing Center opens. On the left you’ll see a list of previous conversations (if any), and on the right a button to create a new one.
Agent Testing Center
Test agent and Quick Chat open the same testing window. You can use either one.
3
Create a new conversation
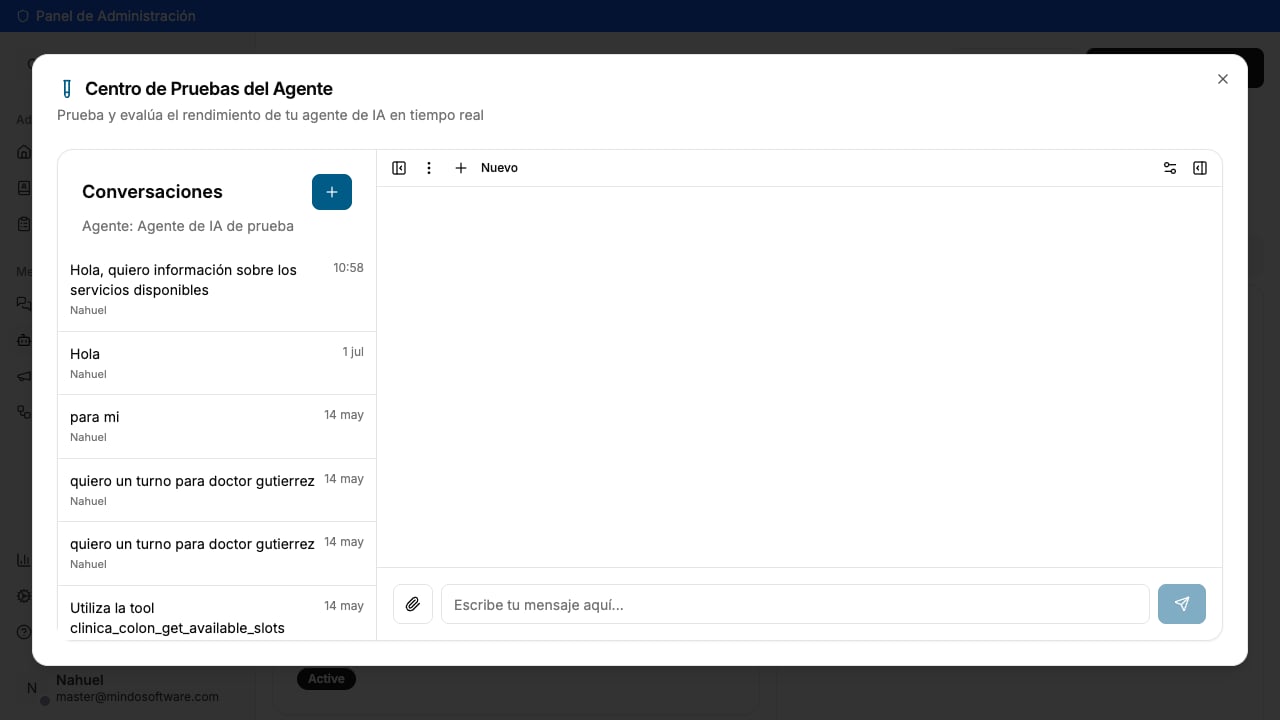
Click New Conversation to start a fresh test. An empty chat opens with the text field ready for you to type.
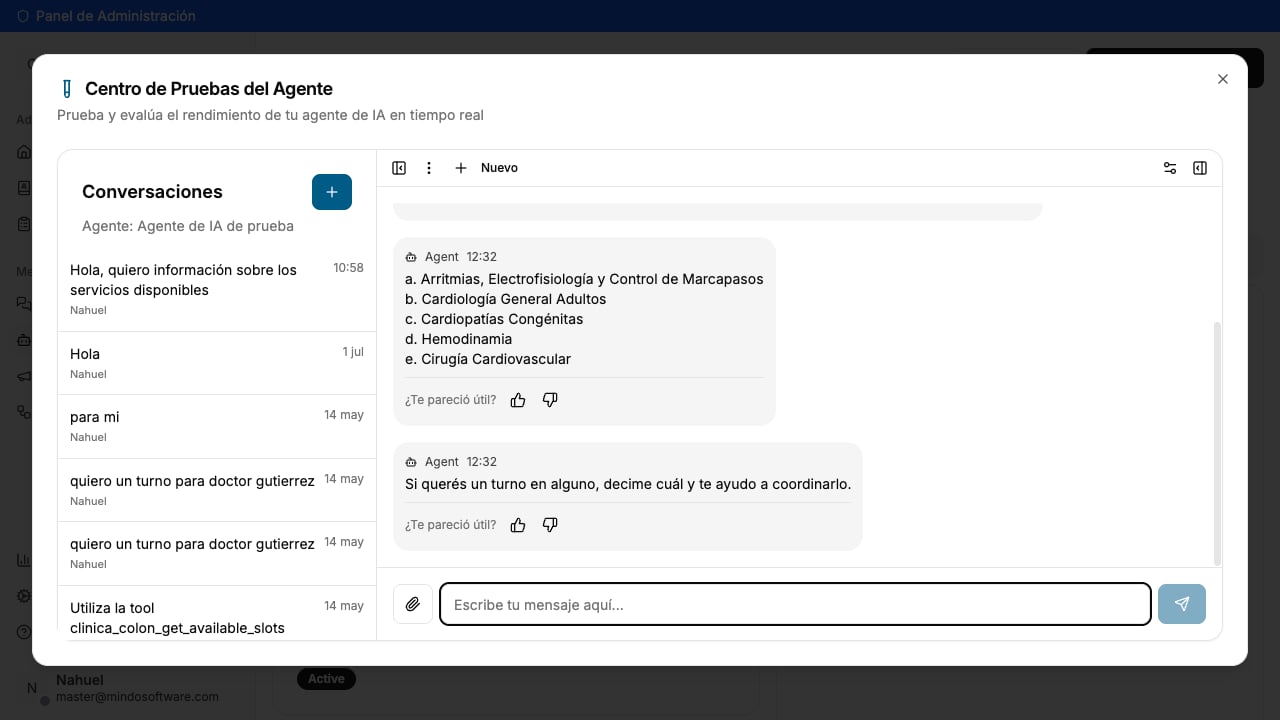
Type a message in the text field as a customer would. For example: “Hi, I’d like information about available services”. Press Enter and wait for the response.The agent processes your message and responds in seconds, just as it would with a real customer on WhatsApp.
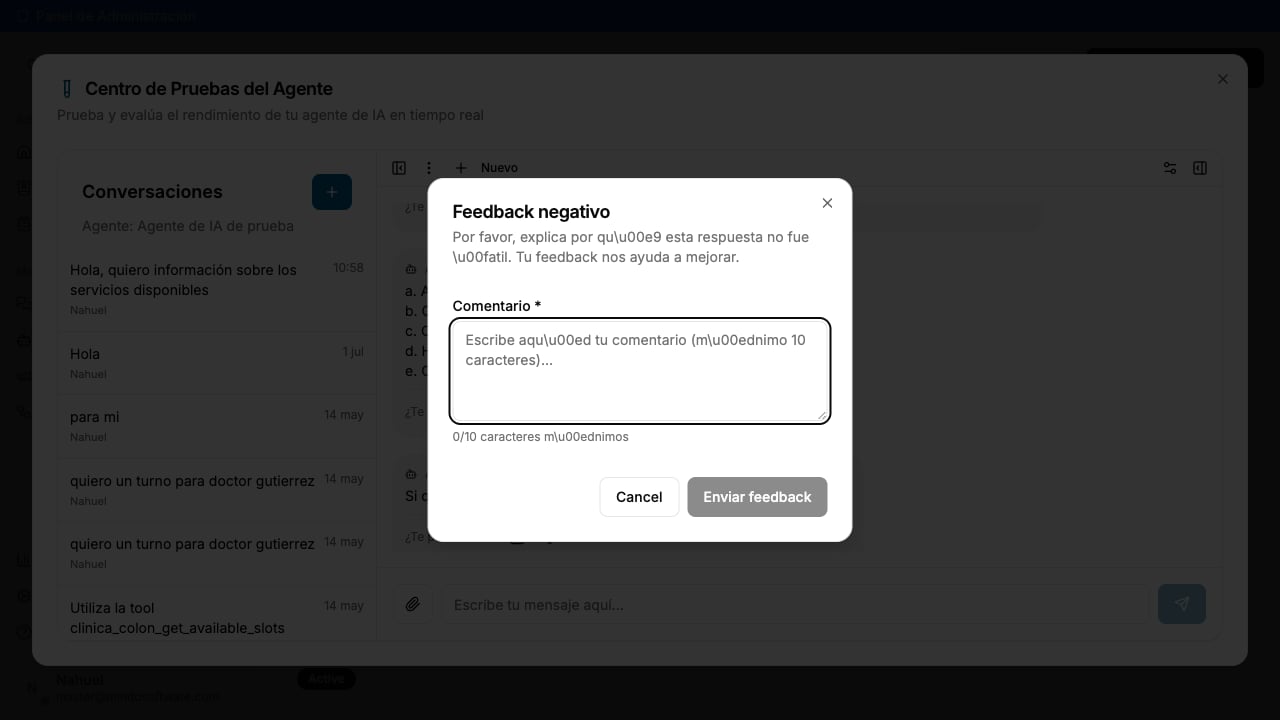
If the response was incorrect, incomplete, or not what you expected, click the thumbs down button. A form opens where you briefly explain what went wrong.
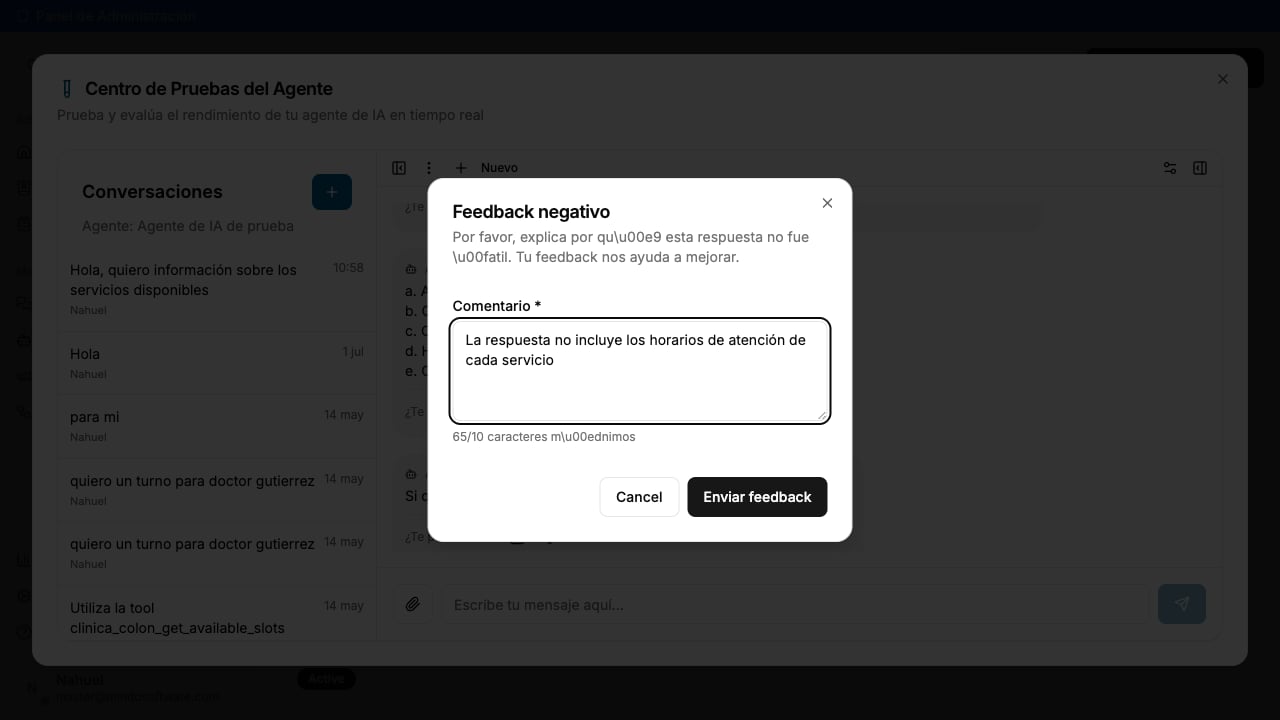
Negative feedback form
Type your comment (minimum 10 characters) describing the issue and click Submit feedback.
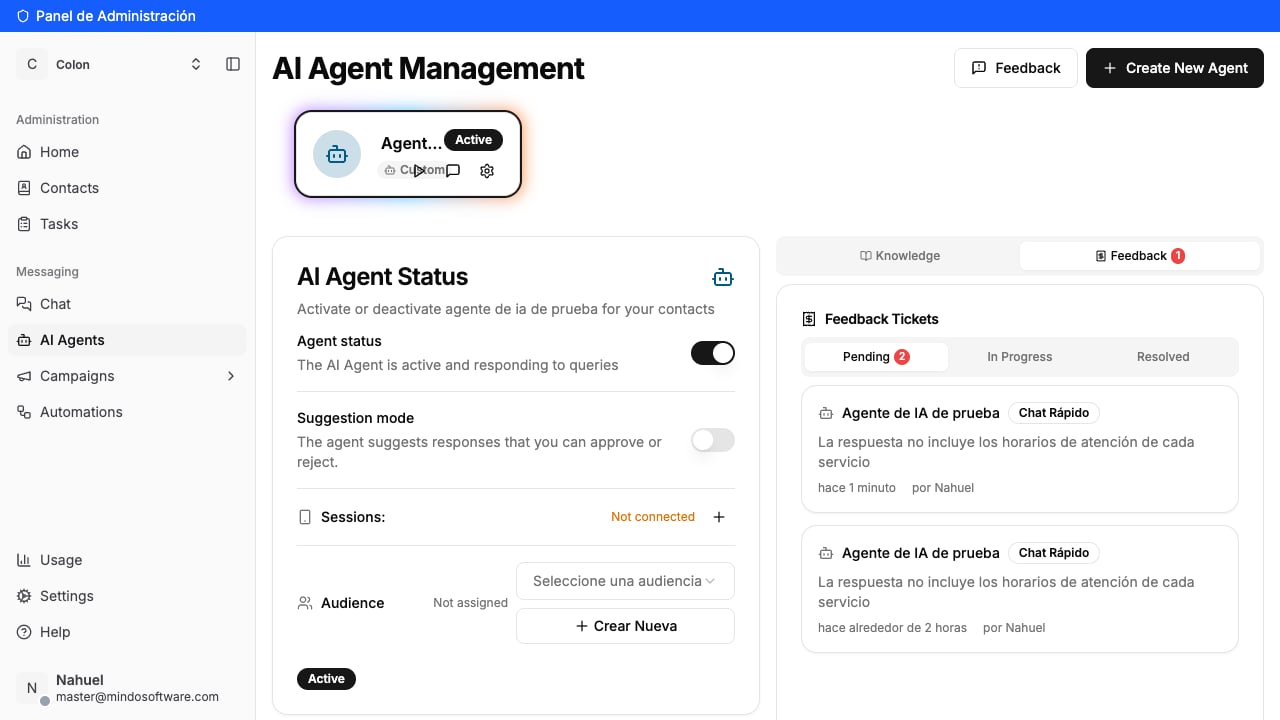
Each negative feedback automatically creates an internal ticket that our team reviews manually. You can see these tickets in the Feedback tab inside your agent’s section.
Feedback ticket generated in the agent's Feedback tab
Tickets go through three stages:
Status
Meaning
Pending
The ticket has been created and is awaiting review.
In Progress
Our team is working on the improvement.
Resolved
The issue has been fixed and the agent has been updated.
You don’t need to do anything else after submitting feedback. Our team reviews each ticket, analyzes the agent’s response, and makes the necessary adjustments to improve its behavior.
No. It’s a testing environment. Messages you send there don’t reach any real contacts — they only serve to test your agent.
How often should I test my agent?
We recommend testing it every time you make changes to its configuration, policies, or the information you provide. This way you make sure its responses remain accurate.
How long does it take to resolve a negative feedback ticket?
Our team reviews tickets continuously. Resolution time depends on the complexity of the adjustment, but they are generally resolved within a few business days.
Can I see the history of test conversations?
Yes. Every time you open Quick Chat, you’ll see a list of all your previous conversations on the left. You can click any of them to review it.
Can I attach files in Quick Chat?
Yes. The clip button to the left of the text field lets you send images, PDFs, or videos, just as a customer would on WhatsApp.