

What it is
The web chat widget is just another channel in MINDO (like WhatsApp, Instagram or ManyChat): a chat bubble you embed on your site with a<script> that connects
your visitors to your MINDO inbox. Whatever they write lands in the same Inbox where
you already handle WhatsApp, and your team (or your AI agent) replies from there —
the visitor gets the answer in real time, without reloading the page.
It supports two kinds of visitor:
- Anonymous — requires nothing from your backend. The widget generates its own
visitor identifier (stored in the browser’s
localStorage) so it recognizes the person between messages. - Identified — if the visitor is already logged in to your site, your backend can sign their identity so MINDO recognizes them. This merges, under a single contact, every chat that user opens from different devices, and keeps the conversation available when they come back.
Before you start
Make sure you have:- Access to Settings → Channels in MINDO with an administrator role.
- Access to your site’s code (to paste a
<script>). - If you’re going to identify logged-in users: access to your site’s backend, to sign the identity. The signature is always computed on the server, never in the browser.
Step by step
Create the Web channel
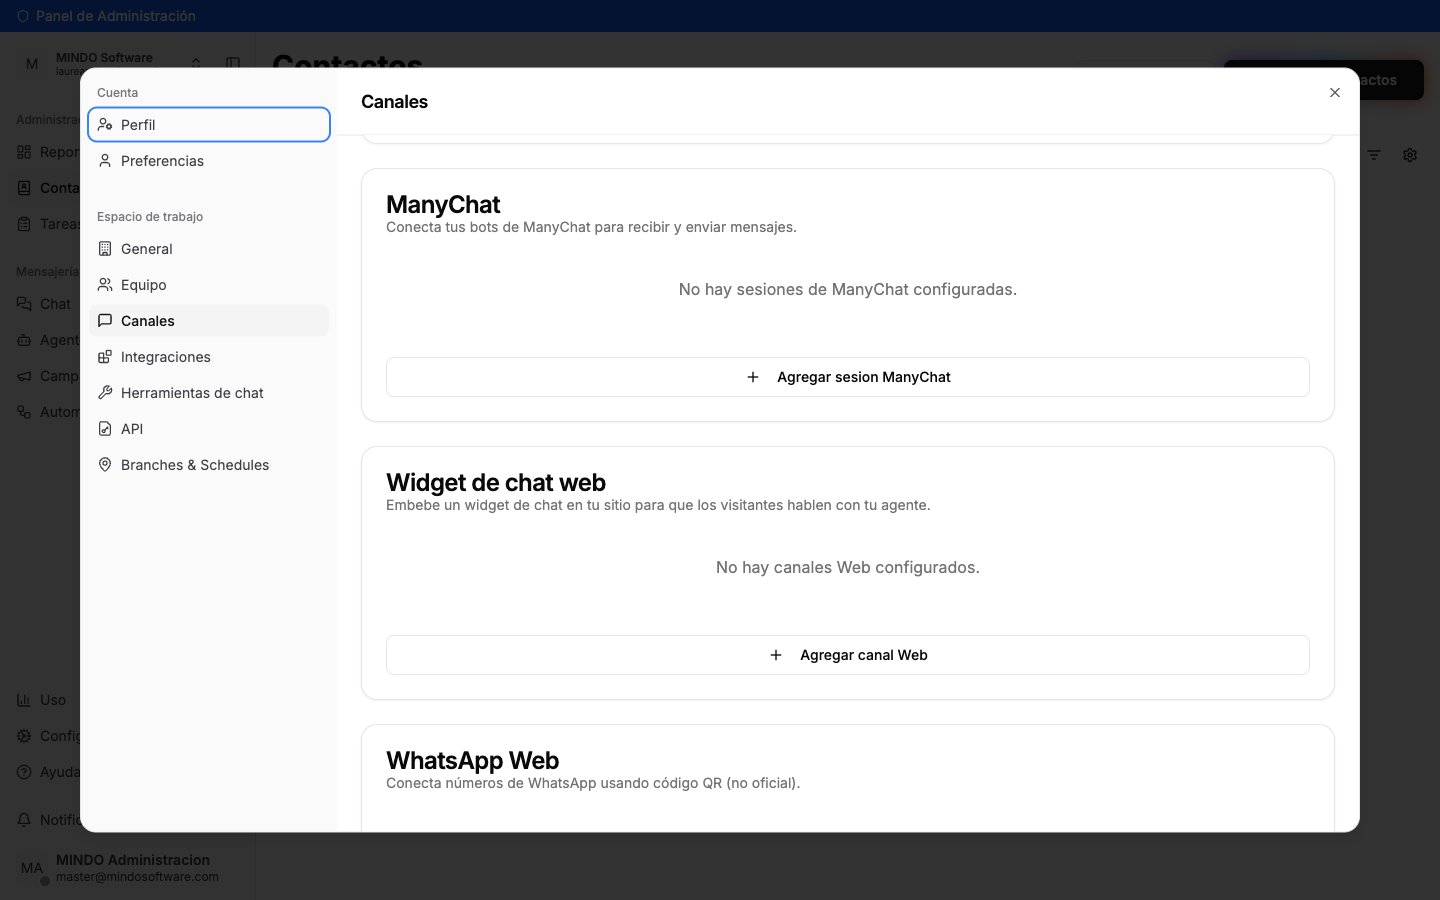
Web chat widget section in Settings → Channels
- Session name — identifies the channel inside MINDO and is also the title the visitor sees in the chat header (for example, “Store chat”).
- Primary color — the color of the panel header, the visitor’s bubbles and the Send button.
- Welcome message — the first message the visitor sees while there’s no conversation yet. It isn’t stored as a message and doesn’t trigger the agent.
- Agent (optional) — if you want an AI agent to reply automatically on this channel.
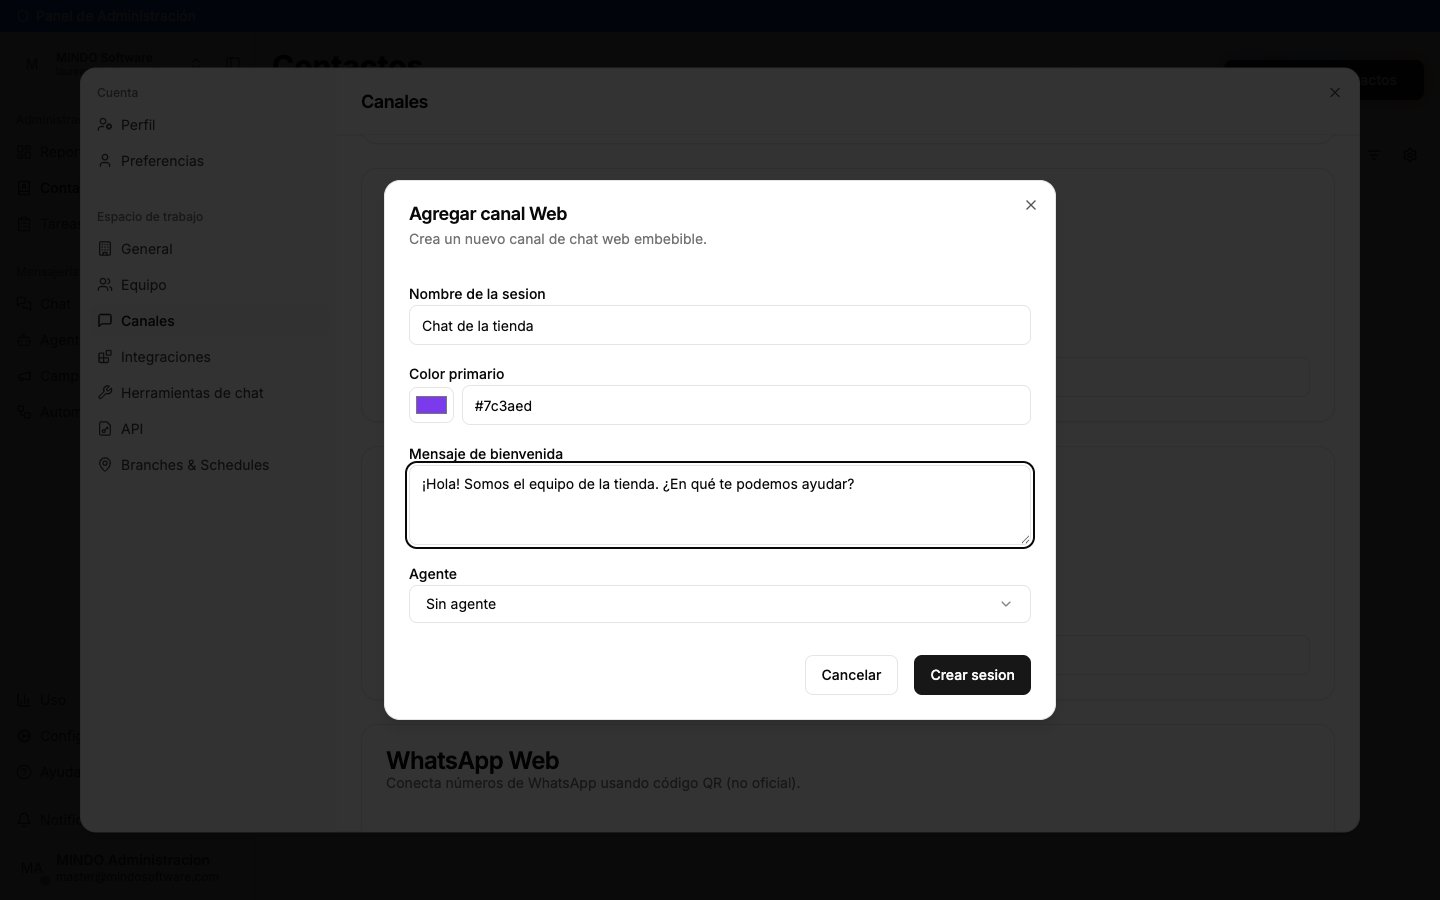
Web channel creation form
Copy the snippet
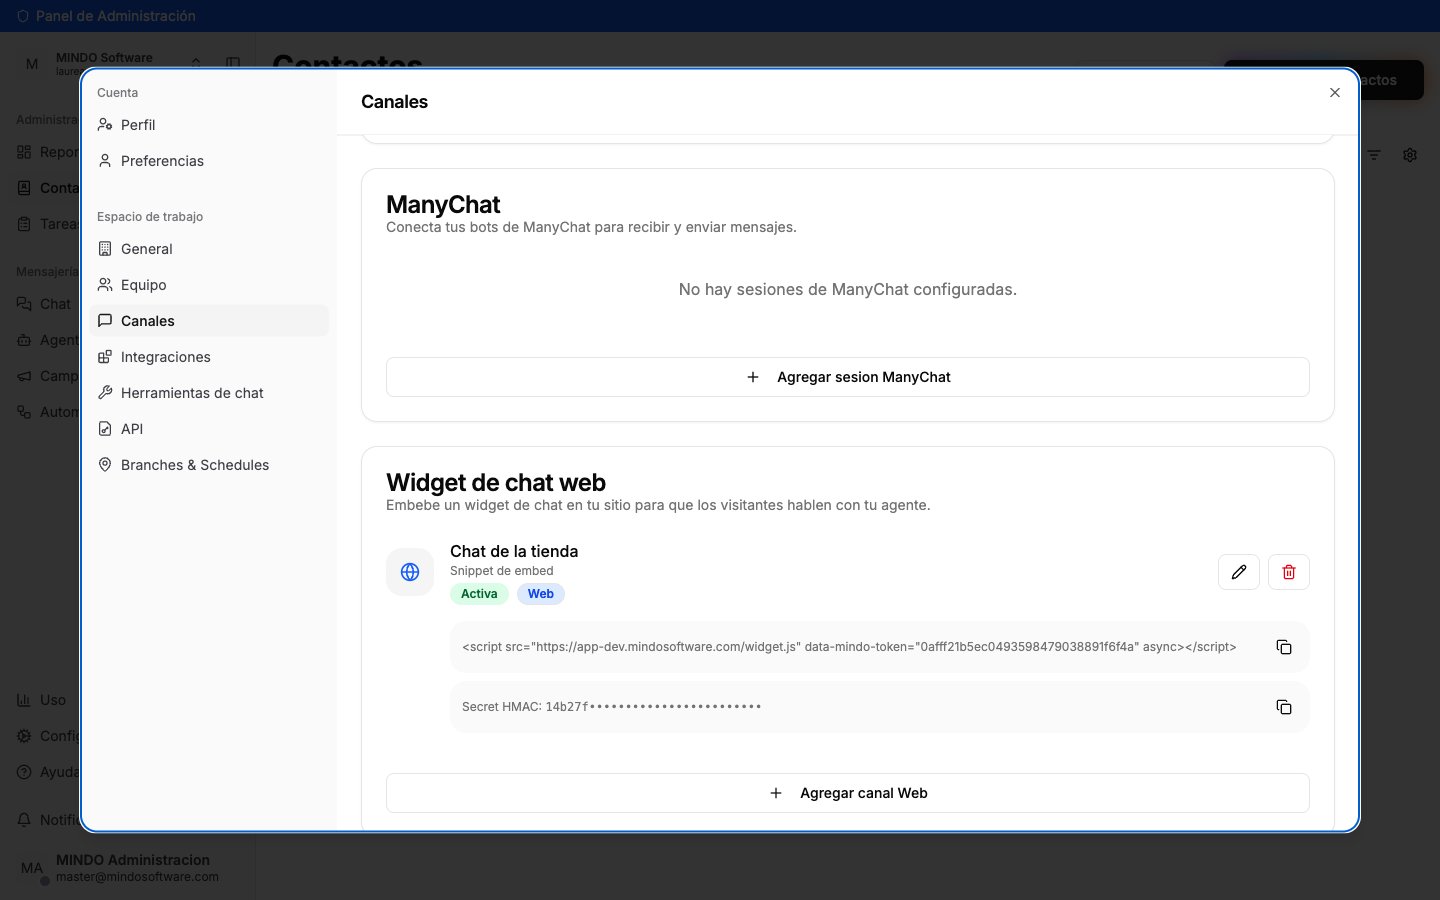
Snippet and HMAC Secret of the newly created channel
Paste the snippet on your site
<script> right before the closing </body> on the pages where you want
the chat to appear. No build step or dependency is needed — it’s a self-contained
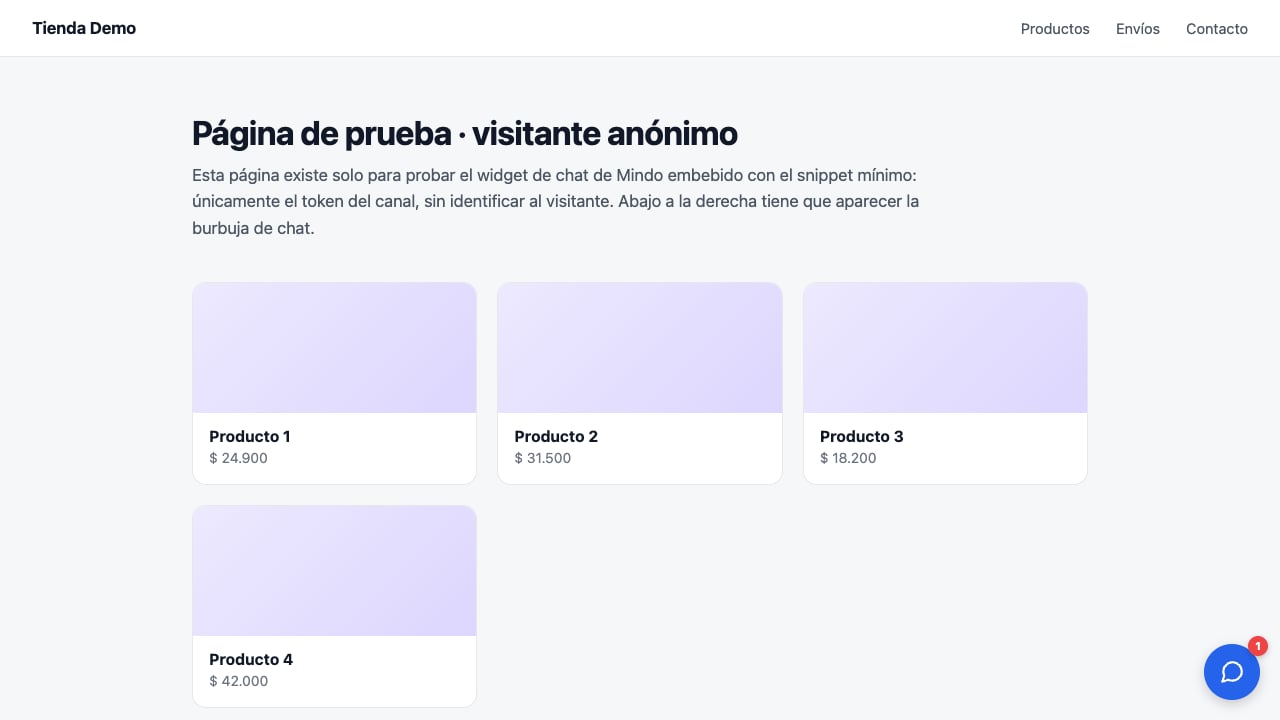
vanilla script.When the page loads you’ll see a chat bubble at the bottom right. Clicking it opens
a panel with the chat (it’s an <iframe> to MINDO, so your site doesn’t need to
implement any chat UI).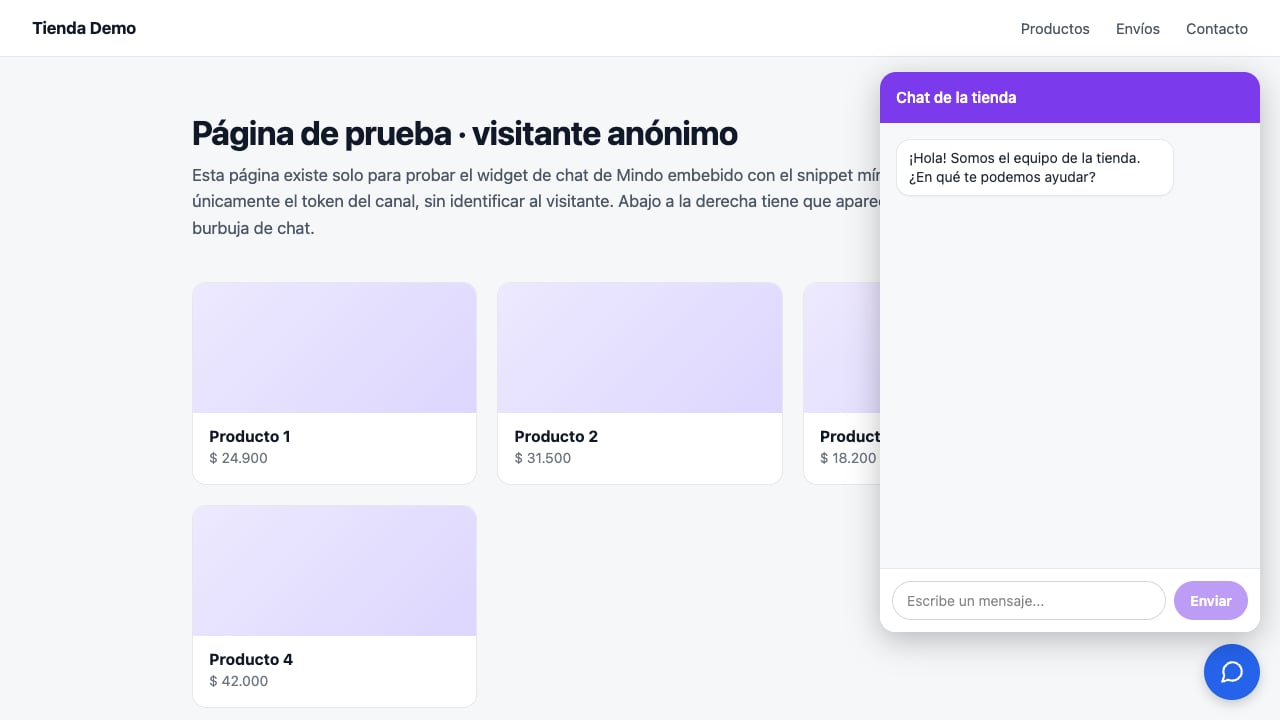
Widget panel open over a sample site
data-mindo-token.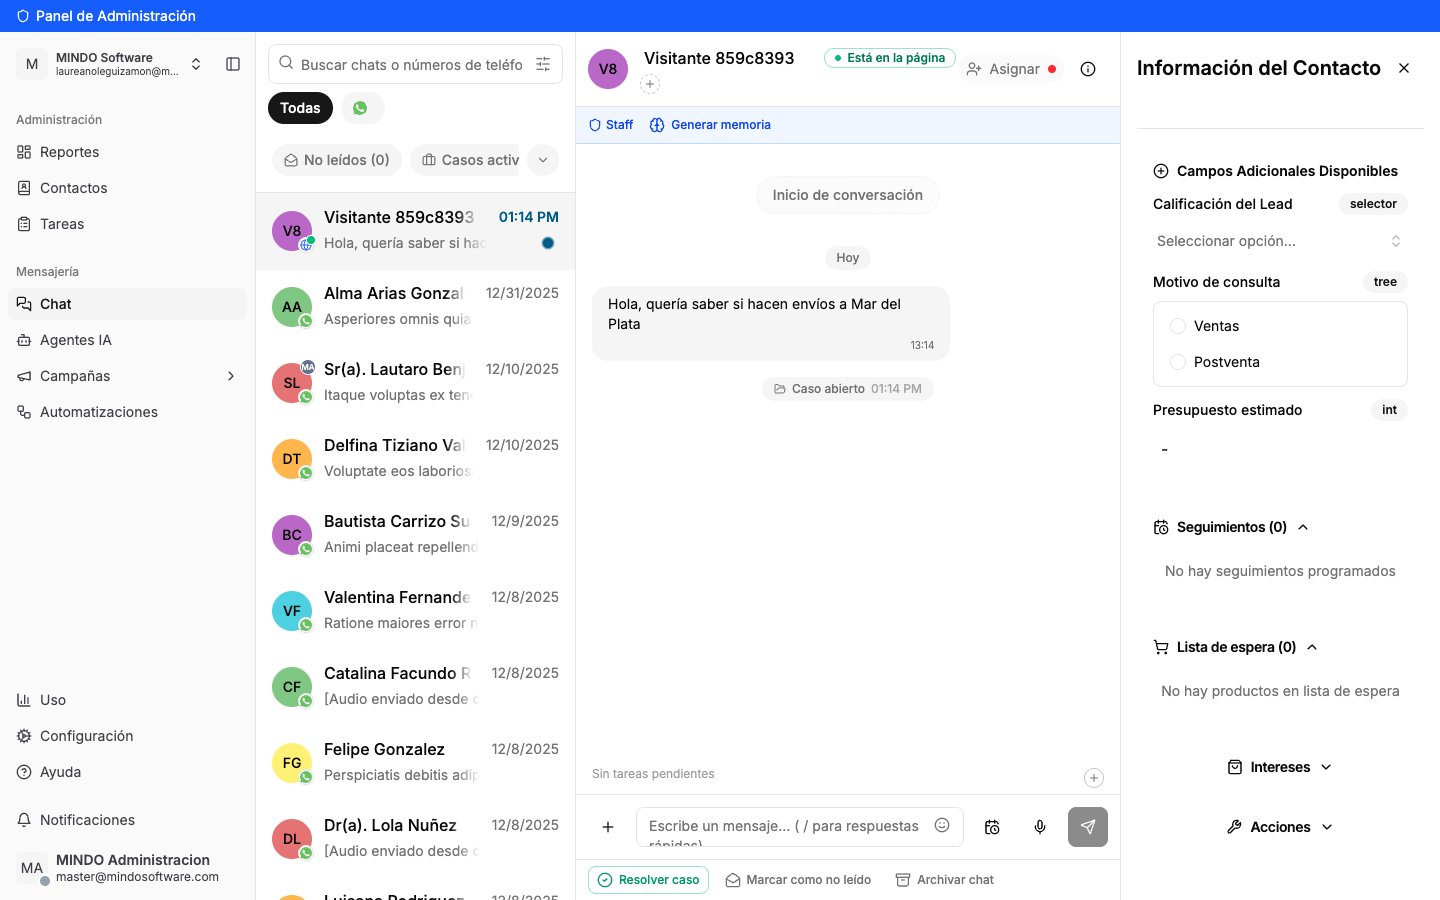
Widget chat in the Inbox, with the presence indicator
(Optional) Identify logged-in visitors
data-mindo-identity attribute.The JWT is signed with the HS256 algorithm using the channel’s HMAC Secret,
and its payload accepts these fields:<script> from a server-side template: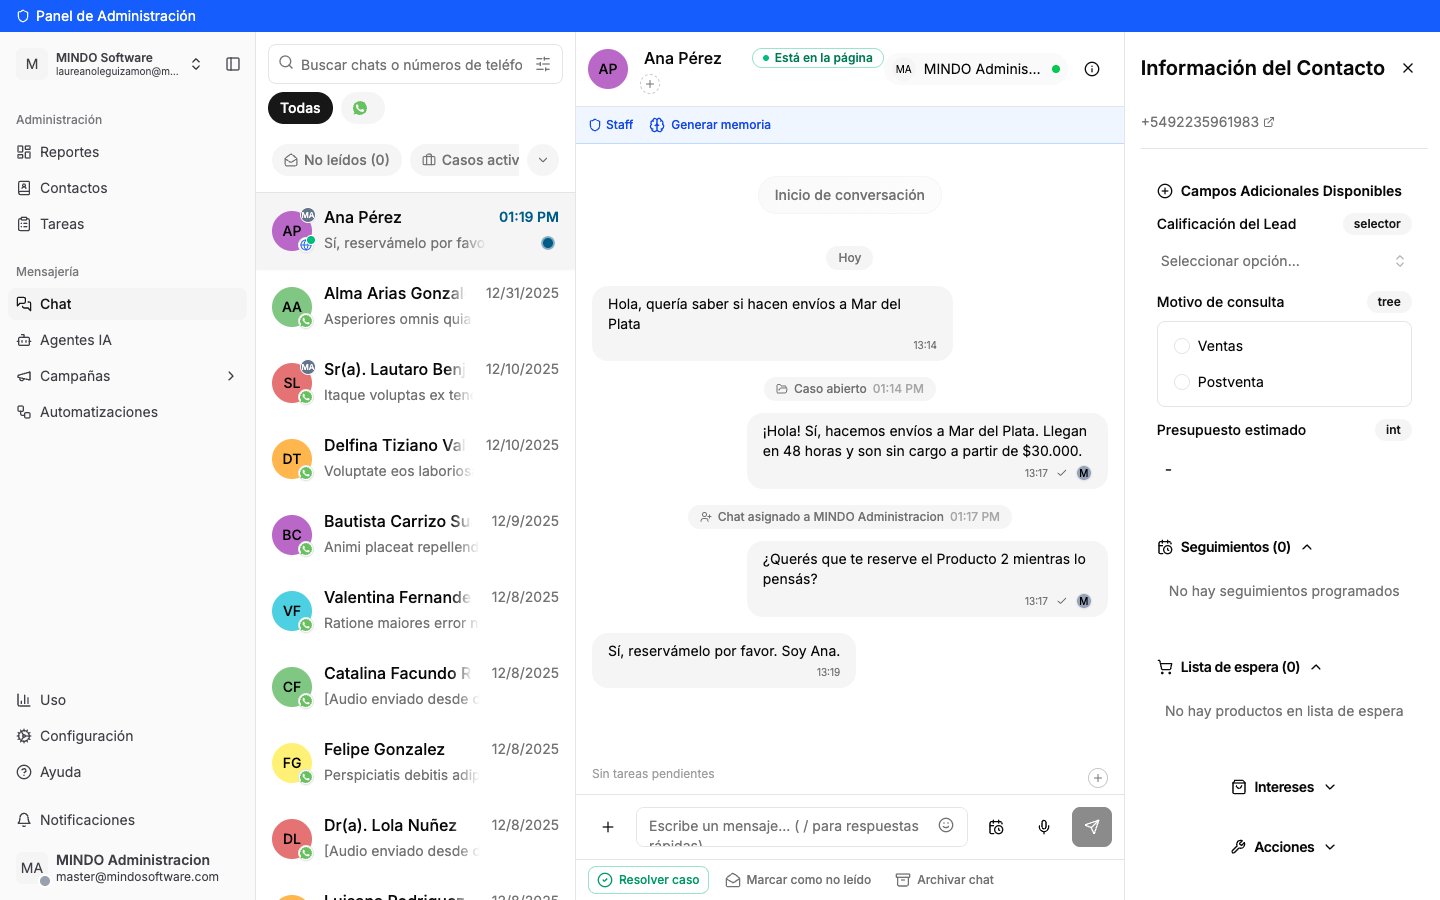
The same chat, now identified as the real contact
exp is in seconds (not milliseconds) and
less than 7 days away, that the claim is named sub, and that the algorithm is
HS256.Previous method: the three attributes with an HMAC signature
Previous method: the three attributes with an HMAC signature
userId:expires using : as a separator, so it can’t carry a name
or an email without becoming ambiguous. The JWT signs the exact data and lets
you send name, email and phone — which is what gives the contact a real
name and merges it with their WhatsApp chat.(Optional) Identify the visitor after they log in
window.Mindo object:async, so window.Mindo may not exist yet when your code
runs. That’s what the command queue is for: queue the calls and the widget processes
them once it finishes loading.localStorage under the key mindo_identity, the widget picks it up on its
own. This covers logging in from a new tab or through an OAuth redirect, because the
widget listens for changes to that key. The same value can be broadcast over a
BroadcastChannel named mindo-identity.setUser and clearUser, window.Mindo exposes open(), close() and
toggle() to control the panel from your own UI (for example, a “Need help?”
button), and on(event, callback) / off(event, callback) to listen for open,
close, unread, identity, identity:cleared, auth:login and
auth:register.(Optional) Invite visitors to log in from the chat
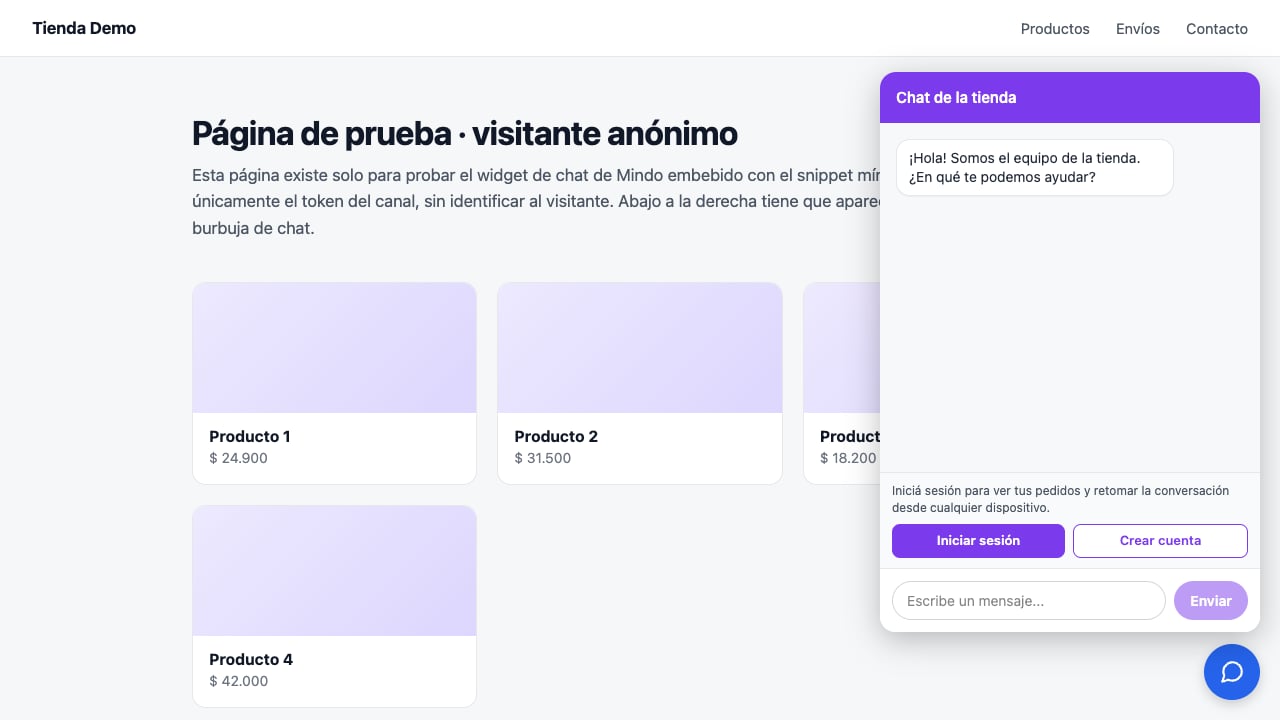
Login and sign-up buttons inside the widget panel
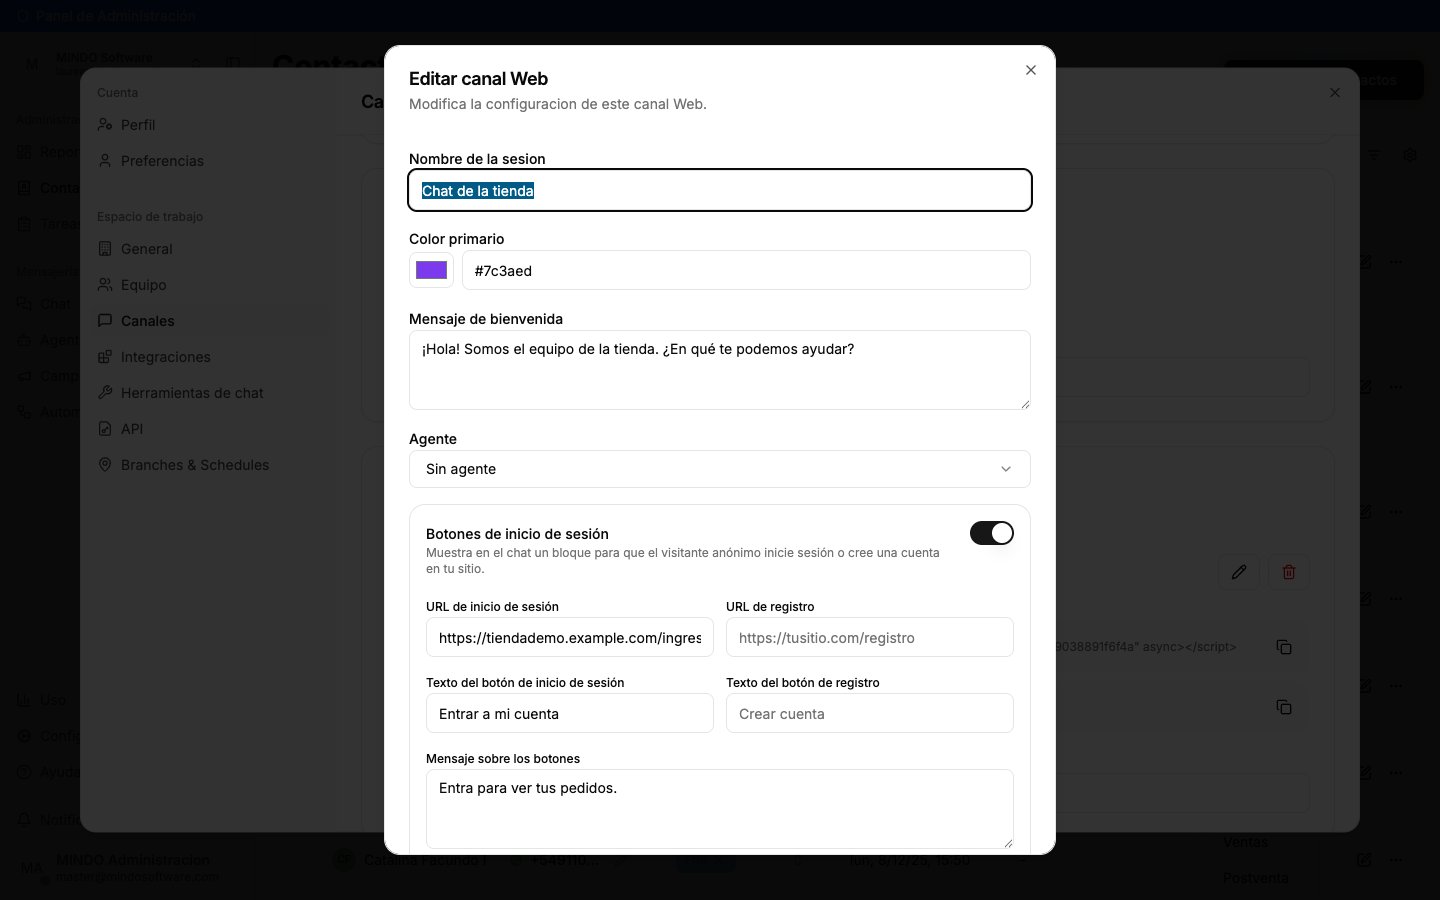
Login buttons section when editing the channel
false from the handler cancels the opening.What happens next?
- Every message a visitor sends creates (or continues) a chat in your MINDO Inbox, with
Channel: Web. - If you identified the visitor and that same person writes from another device with the
same
sub, MINDO merges the history under a single contact. - If the JWT includes
phoneand that number already exists as a WhatsApp contact, MINDO merges them: you get one contact with both conversations (the widget one and the WhatsApp one) instead of two different people. - If you have an AI agent assigned to the channel, it can reply automatically; if not, the chat waits for a human reply like any other channel.
Frequently asked questions
Do I need to install anything on my site besides the script?
Do I need to install anything on my site besides the script?
<script> is self-contained: it creates its own bubble and its own chat
panel (an iframe). It requires no CSS, dependencies or build step.Can I have the widget on several pages of my site?
Can I have the widget on several pages of my site?
What happens if the visitor reloads the page mid-conversation?
What happens if the visitor reloads the page mid-conversation?
Does the visitor notice if we reply while the chat is closed?
Does the visitor notice if we reply while the chat is closed?
Unread counter over the bubble
phone / email): with that data you can pick the conversation back up on another
channel.Can visitors send photos or audio?
Can visitors send photos or audio?
Are there usage limits on the public endpoints?
Are there usage limits on the public endpoints?
What if I don't set up identification?
What if I don't set up identification?
Do I have to migrate from the three-attribute method to the JWT?
Do I have to migrate from the three-attribute method to the JWT?
Can I restrict which sites can use my token?
Can I restrict which sites can use my token?
allowed_origins): with an empty
list —the default— there’s no restriction; with origins configured, the page’s
Origin header has to match one exactly or the API responds 403.It isn’t exposed in the Settings form yet: you set it through the API
(PATCH /web-widget/channels/<id>/ with allowed_origins) or from the admin. If you
turn it on, include every domain and subdomain your site is served from: a missing
one leaves the chat broken on those pages.Can I ask the visitor for a phone or email before they write?
Can I ask the visitor for a phone or email before they write?
config.prechat,
with off / optional / required levels for phone and email) but the widget
doesn’t render that form yet, so it never sends that data.Does it have an extra cost?
Does it have an extra cost?